Receiving – Manual – Multiple Periods, Multiple Properties
-
View > Receiving > Locate the respective property which houses the invoice to be split
-
Click the hyperlinked PO # associated with the invoice to split to open the Receiving Entry screen
-
GL code line items as needed
-
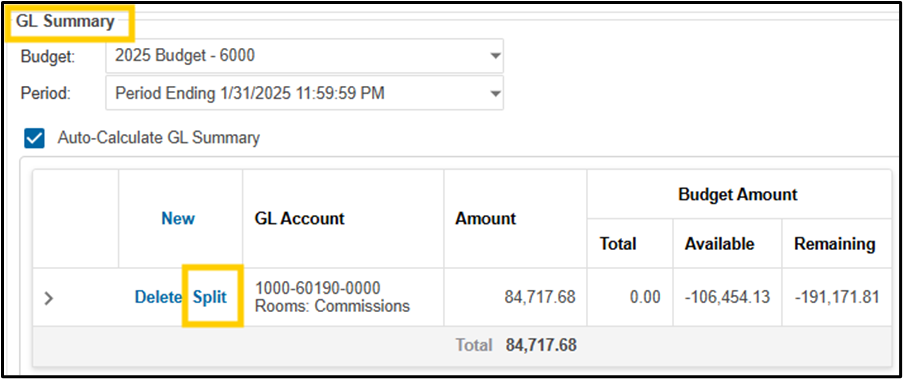
Scroll to the GL Summary portion of the Receiving Entry screen
-
If all applicable settings are in place, a hyperlink will appear next to each GL in the GL Summary called Split
-
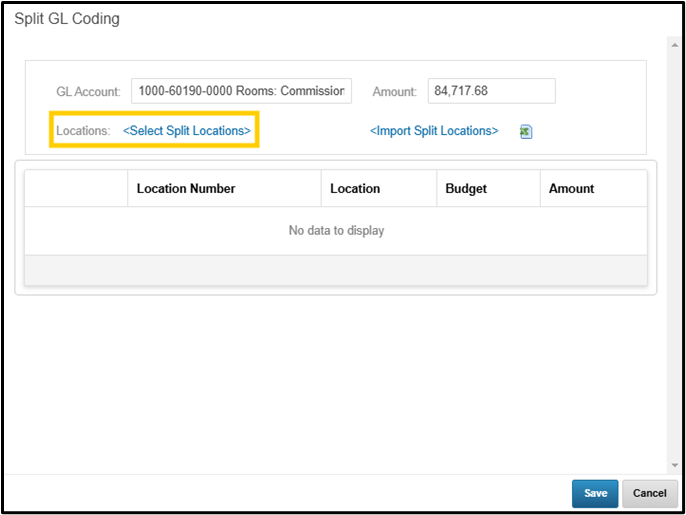
Click Split next to the GL needing to be split amongst multiple properties

-
Click Select Split Locations to select the properties you wish to split the invoice amongst
-
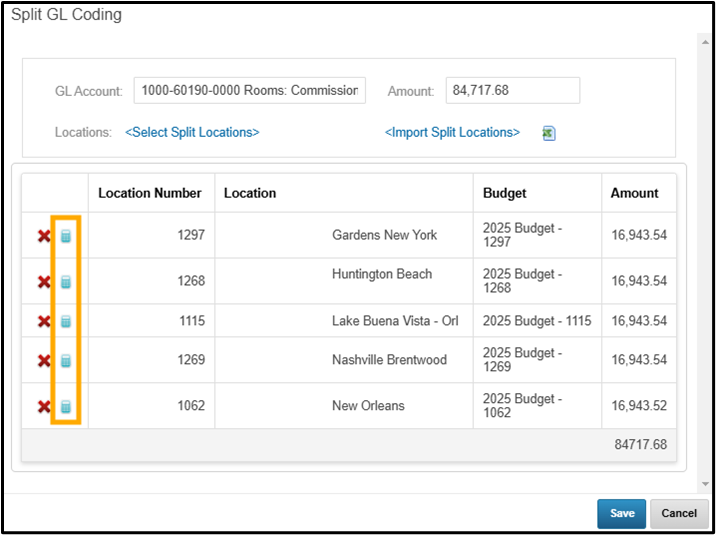
Select the properties which need to be allocated against the current invoice by clicking the checkbox next to each property > Save
-
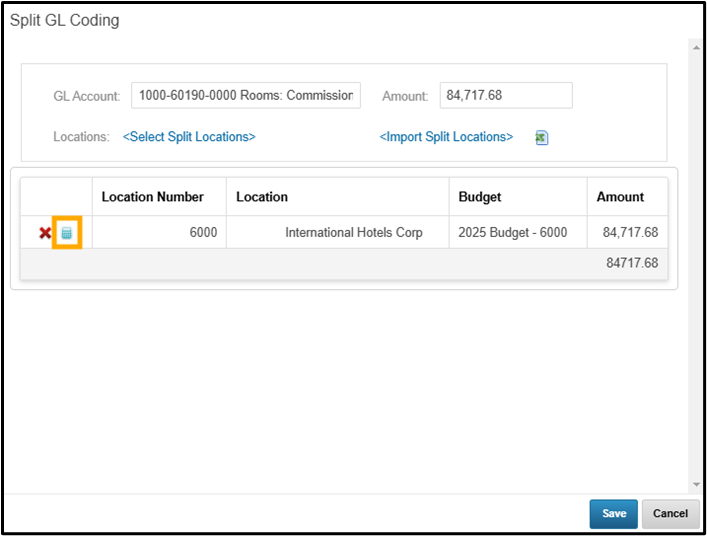
The system will automatically evenly split the invoice amongst the properties selected.
-
To further split amongst multiple periods for each split property, click the Calculator icon next to each location #
-
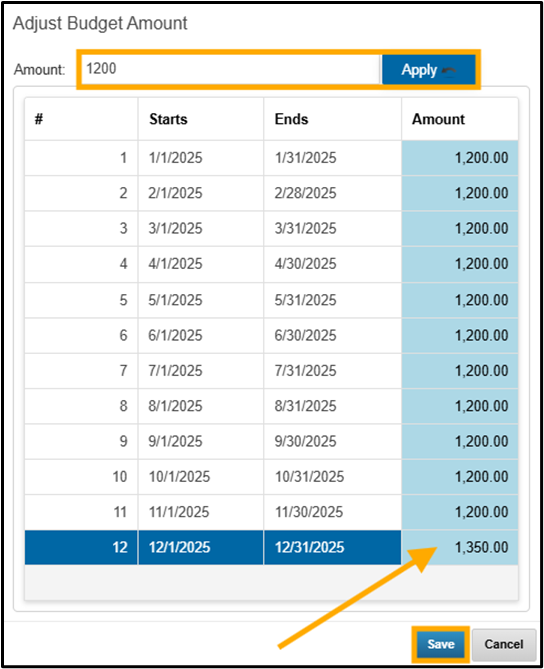
To assign equal amounts to all periods, enter a value in the Amount field at the top of the screen > click Apply
-
Otherwise, assign applicable dollar amounts in the Amount field for each specific period utilizing the split > click Save
-
Repeat for additional properties as needed
-
-
Click Save
-
Click Submit to finalize the receiving entry
Receiving – Manual – Multiple Periods, Single Property
-
View > Receiving > Locate the respective property which houses the invoice to be split
-
Click the hyperlinked PO # associated with the invoice to split to open the Receiving Entry screen
-
GL code line items as needed
-
Scroll to the GL Summary portion of the Receiving Entry screen
-
If all applicable settings are in place, a hyperlink will appear next to each GL in the GL Summary called Split
-
Click Split next to the GL needing to be split amongst multiple properties
-
Click Select Split Locations – if you want to split the invoice amongst multiple periods for the current property, you will need to select the current property in the Split Locations screen.
-
EX: if an invoice is on property 1238’s receiving screen, you will still need to select property 1238 in the Select Split Locations screen to be able to split the invoice amongst multiple periods.
-

-
Select the applicable property > Save
-
To split the invoice amongst multiple periods for the property, click the Calculator icon next to the location #
-
To assign equal amounts to all periods, enter a value in the Amount field at the top of the screen > click Apply
-
Otherwise, assign applicable dollar amounts in the Amount field for each specific period utilizing the split > click Save
-

-
Click Save
-
Click Submit to finalize the receiving entry
Receiving – Import – Multiple Periods, Multiple Properties
-
View > Receiving > Locate the respective property which houses the invoice to be split
-
Click the hyperlinked PO # associated with the invoice to split to open the Receiving Entry screen
-
GL code line items as needed
-
Scroll to the GL Summary portion of the Receiving Entry screen
-
If all applicable settings are in place, a hyperlink will appear next to each GL in the GL Summary called Split
-
Click Split next to the GL needing to be split amongst multiple properties

-
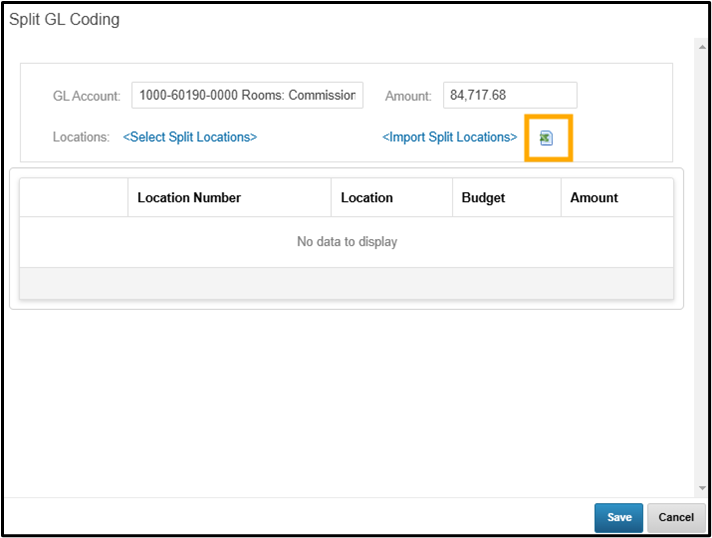
Click the Excel icon next to Import Split Locations to download the import template
-
Fill out the template
-
To split an invoice over multiple periods, fill out the Location Number column, enter the total split per property in the Amount column then enter the appropriate split allocations per period in the Period columns
-

-
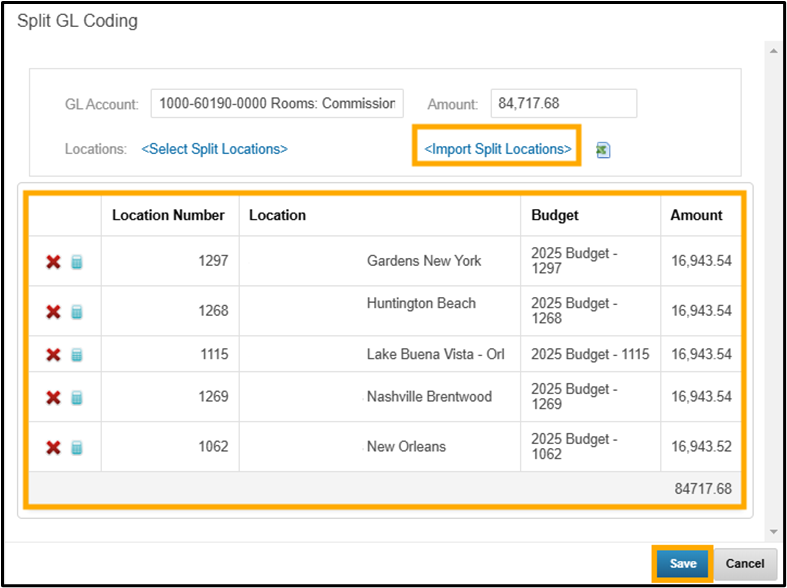
Click Import Split Locations
-
Browse for and select the Split Coding template previously filled out and saved
-
The data from the template will populate on the screen for review
-
Click Save
-
Click Submit to finalize the receiving entry