Open EPRO Analytics
At the top right of the site, click the EPRO Analytics button in the top right corner.

Search for a Report
After Opening EPRO Analytics, search for the report you’d like to run by either:
-
Review the Report types at the header level (Admin, Capital Projects, etc) and click on the drop-down to review those available reports:
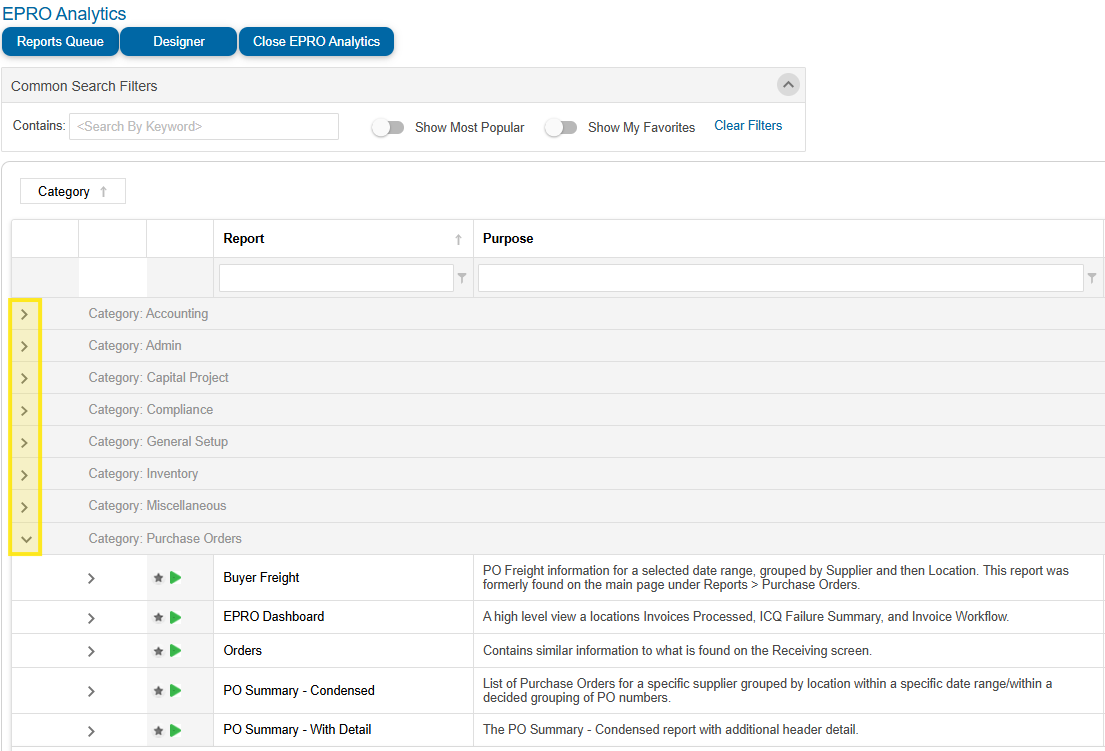
-
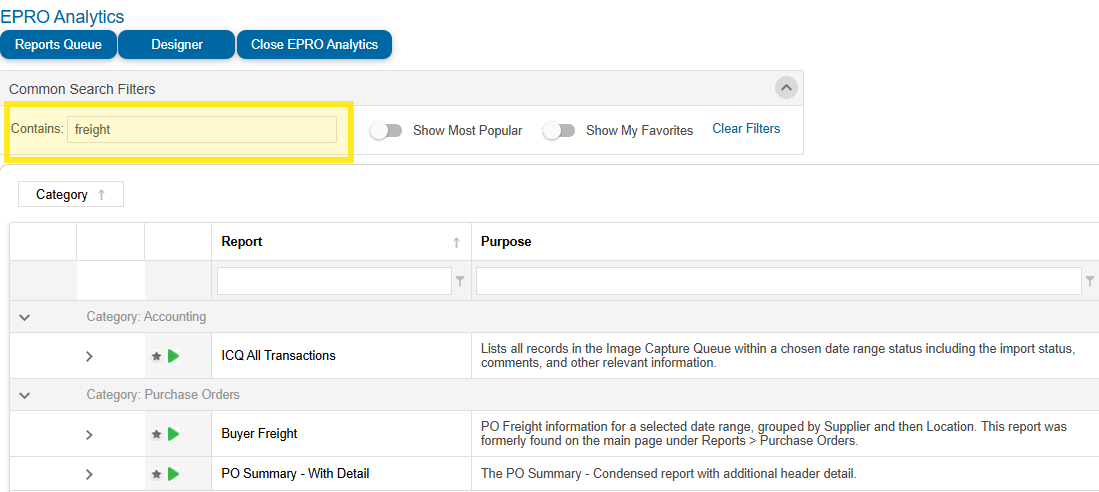
Or search for reports by keyword by typing into the 'Search by keyword field.
Run a Report
-
After finding the report you’d want to run, click on the green arrow ‘Run Report’ button.
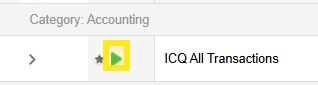
-
A menu will appear presenting many different options for your report. (View below)
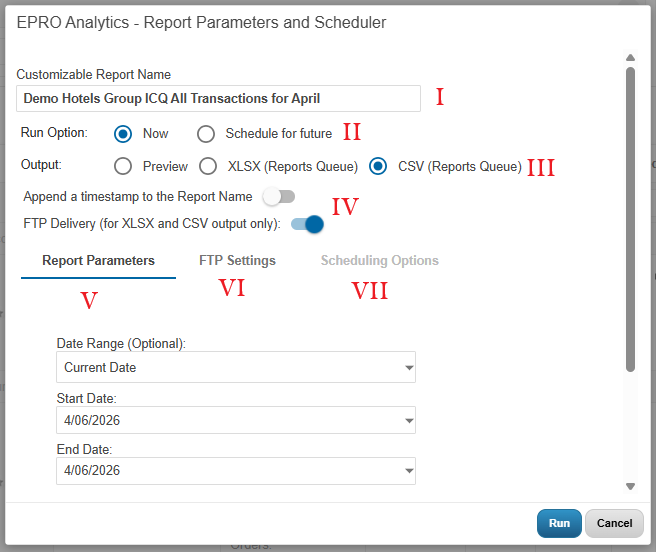
I - Customizable Report Name: The default report name will appear in this editable field. Feel free to leave as is or update to best suit your organization’s needs.
II - Run Option: Choose for the report to be ran now, or in the future. If “Schedule for future” is chosen, the Scheduling Options tab will become selectable. View “VII - Scheduling Options:” for more information.
III - Output: Choose how the document will be ran.
-
Preview: you will be brought to a PDF friendly view of the report and its contents.
-
XLSX: exports report as an Excel file
-
CSV: exports report as a CSV file
IV - Optional toggles
-
Append a timestamp to the Report Name: adds timestamp of runtime to report
-
FTP Delivery (for XLSX and CSV output only): If toggled on, the FTP Settings tab will become selectable. View “VI -FTP Settings:” for more information.
V- Report Parameters: this tab will appear for all reports and houses a large number of pre-selected parameters to include in your report.
Note: A section displaying the various Report Parameters options are below.
VI - FTP Settings: Personal FTP settings configured in the user account setup will auto-load here.
VII Scheduling Options: These are the parameters for your Report/Scheduling. From here you will be able to provide information in order to output a report of what you need or have your report Scheduled.
Once all settings are set, click Run.
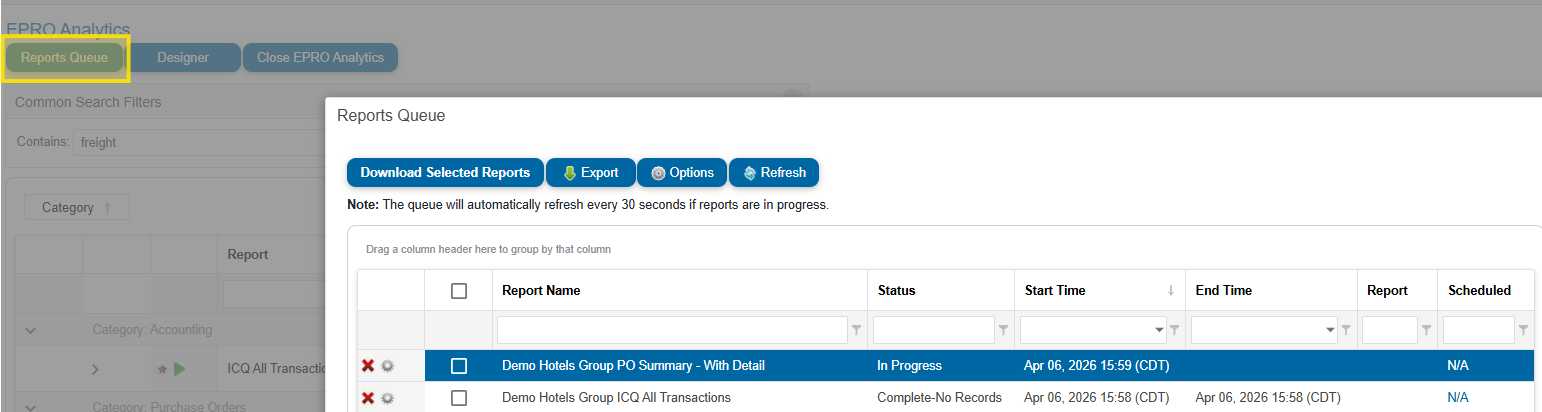
Depending on your output the “Reports Queue” may appear. Click the “Refresh” button on the page to view your report’s status. From here the page will refresh every 30 seconds until all reports in progress reach completion status. After completion, you can download your report. To view the reports queue without running a report
EPRO Analytics Report Parameters
Listed in alphabetical order. These parameters appear across a range of EPRO Analytics reports.
-
Begin Date - Relevant data that exists on or after the Begin Date is included in the report.
-
Delivery Cycle Days - The number of days expected between the time an order is placed and the time the delivery arrives. This parameter is meant to exclude POs that have not yet been delivered. The number of days selected is subtracted from the End Date.
-
End Date - Relevant data that exists prior to the End Date is included.
-
Group By - Allows for POs to be grouped by period (Month, Quarter, Year).
-
Include Line Detail - When set to Yes, the line item detail (products and services) of each transaction is listed under each PO row.
-
Multi-Supplier Options - Limits the transactions on a report to those from suppliers who are configured for the invoice workflow.
-
Posting Cut Off Date - Invoices posted prior to the Posting Cut Off date will not be selected.
-
Supplier - Select one or all supplier to indicate the transactions to include in the report.
-
Suppress Zero Leakage Items - Do not include items where the leakage calculation is $0.
Note
Parameters will vary between each report. See the Report Parameters section below for more details.
Open the Reports Queue
-
Click the Reports Queue button located in the top left corner of the EPRO Analytics landing page.
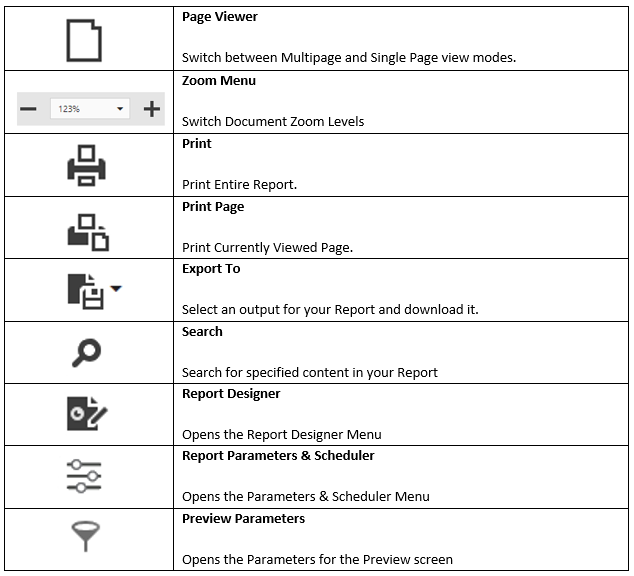
The Preview Screen
Access the Preview Screen
When running a report, select Preview as the output.
Preview Screen Elements